Wednesday, July 10, 2013

Unicycling Unicorn

There is a Kiddie Parade in my town every year to kick off the Fireman's Carnival. I didn't know much about the parade until someone encouraged us to check it out a few years ago.

This year we decided to do it again. Kids dress up, there are strollers, wagons, a few bikes and trikes.  My nine year old daughter rides a unicycle and the three year old can ride a tricycle and bike with training wheels. 

We considered different costume options. First we were going to go with Mickey and Minnie Mouse. We have a Minnie dress. Then I saw a unicycling unicorn and thought a unicorn would be a great idea for my unicycling daughter. We tried to convince the three year old to have a triceratops costume or maybe a pony. At the end, she wanted to be like her sister. 

After surveying our potential supplies, we went with white felt, white micro fleece and organdy ribbon. 

We started with the horn and our helmets. After trying out some thin cardboard, white card stock worked best. Next I used clear packing tape and a hot glue gun to secure white microfleece and ribbon.  For the ears I used white felt and pipe cleaners.  Clear packing tape made it easy to attach everything to the helmets and would later be removable.  I also made a mane, tail, wrist and ankle cuffs out of the microfleece with hot glue.  I would normally sew things, but using the hot glue was quick and easy.

The girls didn't win the competition, but did get an honorable mention and won six dollars.

Friday, July 5, 2013

Mending Cargo Shorts


My son tore a decent hole in a nice pair of cargo shorts.  I didn't take a before shot.  The shorts are the darkest navy and none of my stash matched.  After looking at the pockets, I deemed the inside of one pocket the perfect place to steal a little patch.  Of course it is a perfect match.

Repair work
Patching up the pocket was a little tricky because I was sewing inside the pocket, but it was possible.

You can see a small oval of patch for the hole and a black square patch for the inside of the pocket.
Inside of shorts

Mola Pinwheel Quilt


After sorting through many of her mother's possessions, my MIL had set aside thirteen Molas for me. When I saw them, I offered to put them together into a quilt. I had not seen something like them before and was very impressed with the design and skill involved in creating them. It wasn't until I began asking around and researching that I discovered what Molas actually were.

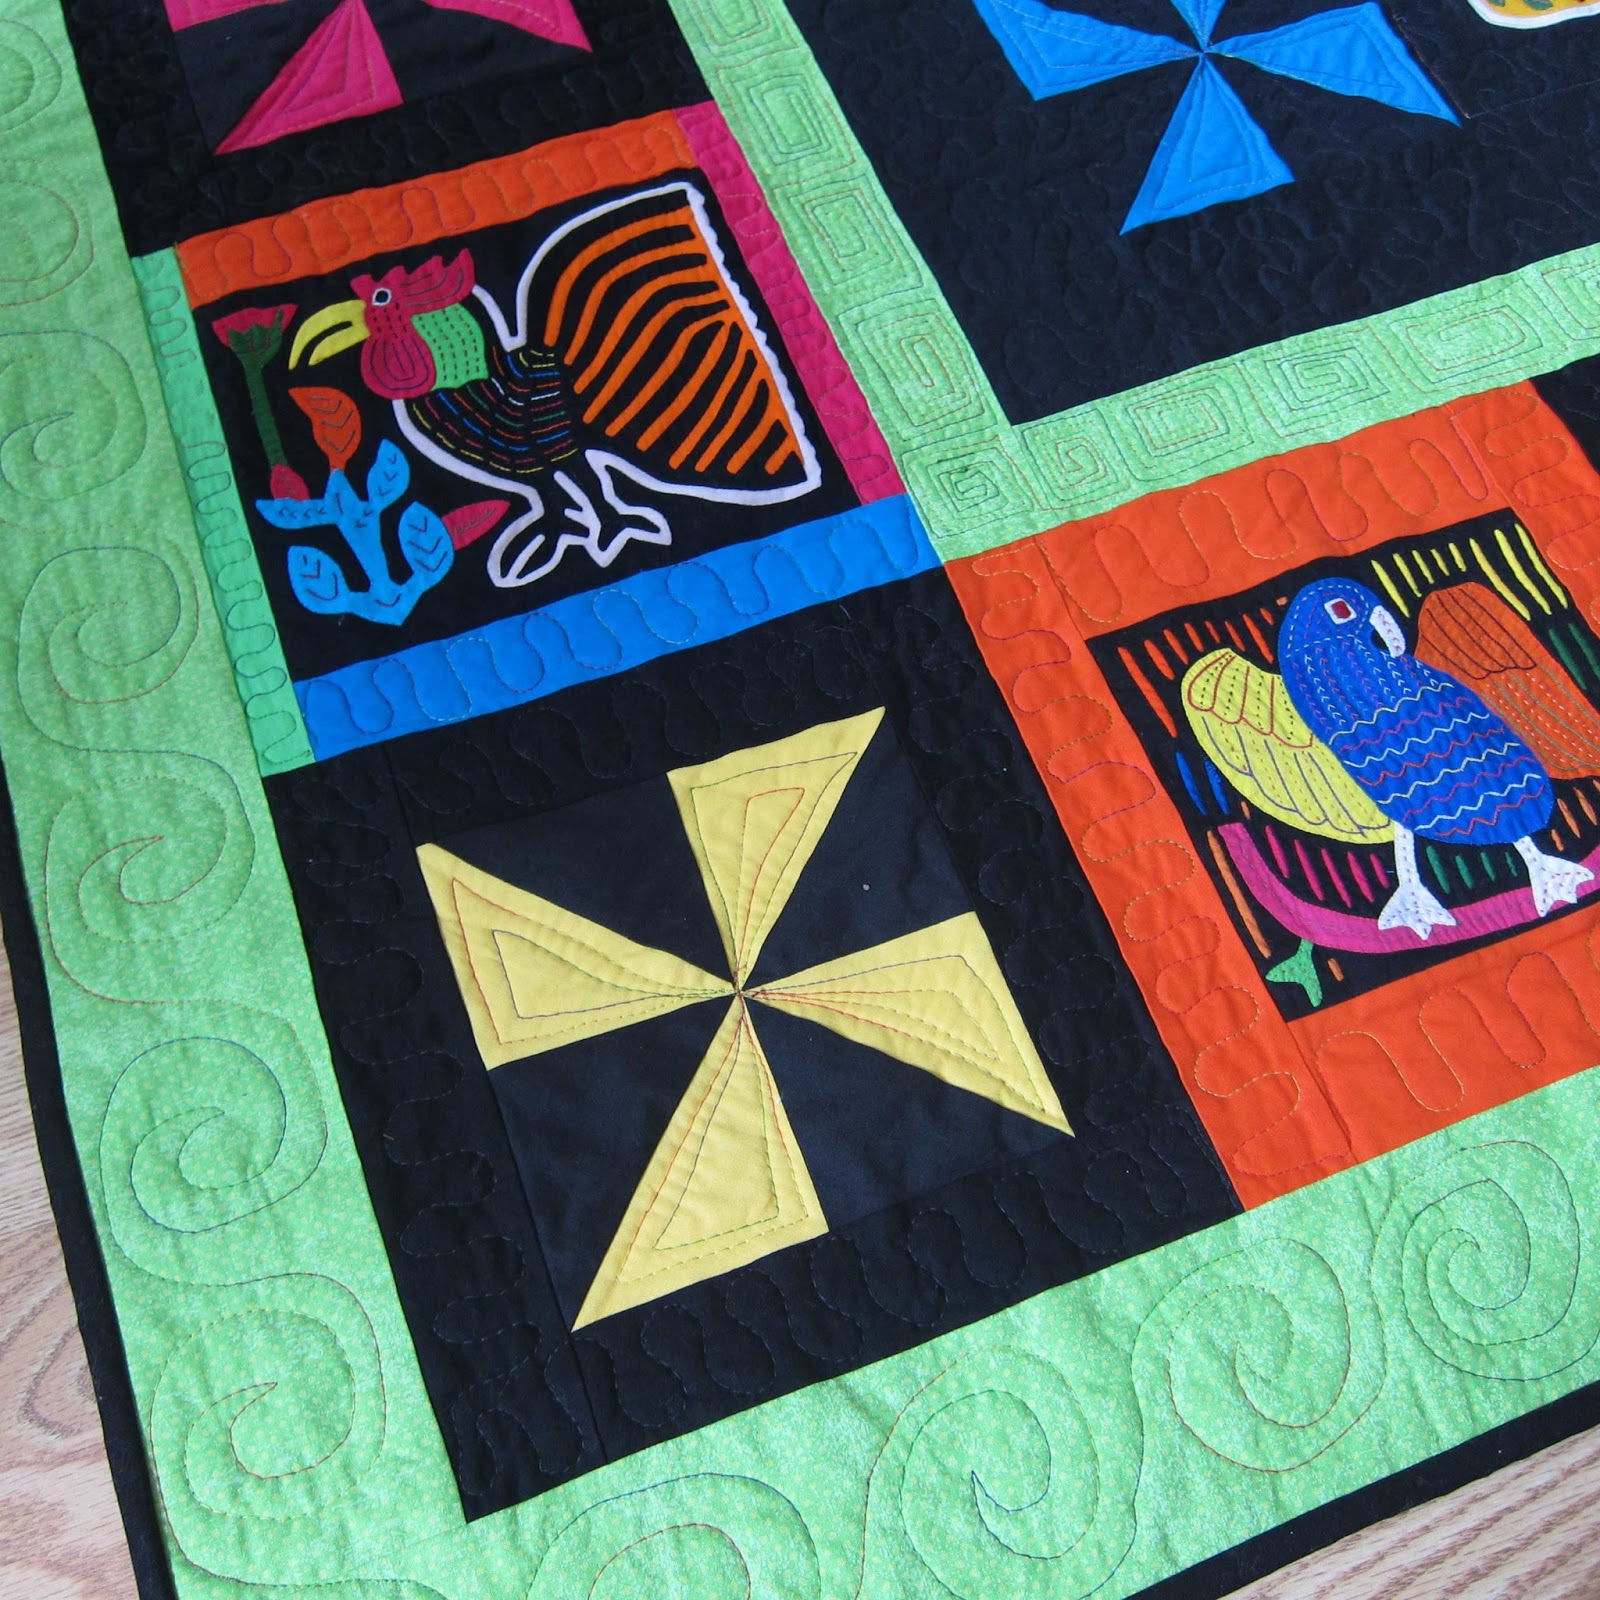
Molas are hand made works of art made in Panama by the Kuna people.  Molas are panels worked into blouses and also sold to tourists. The motifs in the Molas are often taken from nature. Fabrics are layered and much of the designs are done in a reverse appliqué pattern. 

After seeing how amazing these little panels are, I wanted to make sure I had a careful plan to make a quilt that complemented them nicely. 

Buying coordinated solids was the easy part. I laid out the panels in a nine patch and reserved some for the back, after looking at some Google images, I changed up the design in a way to incorporate all the Molas on the front and decided to add pinwheels. 

My quilts to date involved many squares or rectangles and strips. It was interesting to learn about patterns using triangles and the many tricks that can be used. Using a variety of tutorials and guidelines for sizing, I chose to start with a six inch square of black and another color.  Here's a tutorial of what I did. One tutorial recommended cutting this sizing down to a 6.5" block, but I found the 7" pinwheel blocks to work well. 

I ended up using a lot of black in the borders and making some of the Molas bigger, so much that it required two extra trips to the store!
This quilt gave me an opportunity to try wonky stars on the pieced back.  I followed this wonky star tutorial and liked the result.  I typically have done all over free motion quilting lately and a pieced back looks fine with that. After quilting this quilt, it might have looked better with the one print all over.  

After having my 7" pinwheels, and figuring the best size for the center square, I finally settled on 10.5" blocks to surround the center. I bordered some with all the same color and two with four different colors. There seemed to be a decent amount of figuring for the borders and choosing the block sizes.

 I wanted the quilting to complement the Molas. My specialty seems to be all over squiggles, but I was up for a new challenge. After practicing some triangles and square spirals, I learned that doing straight lines and corners takes a little more skill and pausing at the corners helps. My test squares also made me weary to quilt the whole thing in a veriegated thread. I started with black thread on the center area and fell back to my favorite squiggles. 
Next, I gathered confidence to try square and rectangle spirals for the inside border. While they are not perfect, they do compliment the Molas and are similar in style. I added color to the pinwheels also with two triangles in each part. Bordering the Molas came next. Because some borders are narrower than others I decided on a snakelike wiggle. I did the same thing in black bordering the outside pinwheels. Deciding to go bold again, I made wavelike spirals on the outside border. 

When I first read about the Molas and how they are created, I was curious to try the reverse appliqué technique. The label seemed like a good place. It is tricky, but about halfway through the heart, I seemed to really get it.

This quilt gave me many opportunities to try new things and learn about Molas. It was a great project.  


Seven inch Pinwheel Tutorial

After looking around at how pinwheels are created, I chose a simple pinwheel design. There are different methods for making half square triangles and many tutorials about different sized pinwheels. I wanted a medium sized pinwheel. Here is one way to make a 7" square pinwheel block. 

Sunday, June 23, 2013

New Mei Tai for a Friend

Quilted Mei Tai Baby Carrier
When I made my quilted Mei Tai baby carrier back in 2010, a friend of mine put in an order for whenever she might have another baby.  At the time, I couldn't imagine making another.  I had spent a good deal of time figuring out the pattern and also sewing while taking care of a young baby.  My friend just had her new baby and it was time to make the carrier.  I decided to take notes this time in case I ever needed to make another.

First I started with the quilting.  This would be the easy part.  I used my carrier as a guide.  I cut squares and strips that were 2.5", 4.5" and 6.5" and played around with the placements.  After making the mini quilt, I attached a panel of black sateen to the back and quilted through the two layers.

Next I added the borders.  I added 3" strips to the sides, then cut the curve.  Afterwards I added the top and bottom borders, also 3".

The straps dictate how much fabric I needed of the black sateen.  The straps were cut at 82" by 5.5".  I cut four straps and tapered each pair down to 3.5".  The taper started just about 28" measuring from the tapered end, was down to 4" at 24.5" from the end to be tapered.  I also added batting to the straps for padding.  The batting was 18" by 5.5", sewn into the side seams four inches from the top of the strap, turned and top stitched.

The hip straps were next.  One was 22.5" and the other 14.5".  These straps tapered too from 4" down to 2.75".  I used a 2" side release buckle.


Then I attached the hip straps and shoulder straps to the body of the carrier.  It's a little confusing attaching the straps because they go in backwards, but going slowly and checking regularly works well.
Lining up the should strap
Proper placement and orientation for the opposite shoulder strap
Once one row of stitching was holding the straps on, I pinned them to the front of the body and attached the back, pinning carefully and sewing slowly.  I left a small opening in the bottom.
Straps folded in ready for back
All pinned ready to sew the front to the back right sides together
After flipping everything right side out, removing pins and ironing, I sewed up the opening in the bottom by hand.  Finally I top stitched around the outside of the carrier body and also outlined the quilted panel.

baby carrier blue green


Tuesday, June 11, 2013

Preschooler Sewing

My youngest is three and she likes to be involved in everything we do.  She has done some hand sewing before, but likes to have me hold the fabric for her. When I was at the store recently, I remembered to look for an embroidery hoop for her.

We tried out the new hoop today with a scrap of muslin. She still wanted me to hold the hoop, but we both were much less likely to get poked. 

It was a perfect little project. We used fairly short strands of thread and changed colors frequently. 

She enjoyed making some x's and making different length stitches. The hoop is 4" diameter. 

Monday, June 10, 2013

Slightly Healthier Chocolate Chip Cookies

Having been informed about the overly ripe bananas in the house and a request for cookies rather than muffins, I sought out a recipe for banana cookies. After seeing a few recipes, I decided to simply follow a traditional chocolate chip cookie recipe and make some changes along the way. The result is a sweet, banana flavored cookie that has a bit of a cake or muffin-like texture. I would highly recommend them. Also, I'm sure plenty more substitutions could be made successfully making them healthier yet. They are awfully light in color having only white flour.

2 ripe bananas
1/4 cup granulated sugar
1/4 cup brown sugar packed
1/4 cup softened butter
1 egg
2 tsp vanilla

1 tsp baking soda
1/2 tsp salt
2 1/4 cup flour
1 cup oats
1 cup semi-sweet chocolate chips

Bake 11 mins at 375 degrees.  Edges will get a touch golden. Yields 4 dozen cookies (+4) using a 2 tsp small cookie scoop. 

Before and after baking, they don't change too much.