Showing posts with label hand sewing. Show all posts

Saturday, March 12, 2022

Flower clips from leis

My daughter and her team are participating in a Hawaiian themed meet.  One parent purchased leis for everyone and had some extras.  I offered to make flower hair clips out of the extras.  

I had followed a tutorial in the past for making hair clips.  They used different sized flowers, pulled apart and then hot glued together.  To cover the center hole, a coordinating gemstone was stuck on.  


When I received the leis, it was clear I would need to use a different technique.  These leis have beautiful flowers and they're quite big.  I wasn't able to get a 3D effect layering them.  I decided to make two sets of layers and then fold them together.  I liked the look of them, but it didn't seem like hot glue was going to be the best medium for these.


I created two sets of 4 flowers layered and slightly off-set.


I then put the two sets together and sewed the folded edge together. 


The final step was to sew a metal hair clip to the flower.


Wednesday, October 22, 2014

Items for Silent Auction

LLL of New York is holding a conference next month and they are looking for items for the silent auction.  As soon as I made a babywearing bendy doll, I knew I should make another for the action. I found a child sized toy sling I had made up also.


I remembered I had some half finished felt cookies that were easy to finish up as well.


Finally I collected some hair bows for a smaller "tricky tray" part of the silent auction.


Thursday, October 16, 2014

More Little Dolls

The doll making has been a lot of fun.  I found some wooden peg dolls and practiced more with the embroidery floss wrapping.

Together with my four year old, we made our family out of wooden peg dolls.  Later, my husband did cut down one of the little ones to make her smaller.  I especially like the teen boy's hair.


The little girl dolls were fun to make.  I created a few for gifts as well.  They remind me of little worry dolls.  I liked these two tutorials:  Bendy Doll Tutorial and Making Bendy Dolls.


My older daughter liked them too and requested a bed for two.


A high school friend of mine just recently lost his six year old son.  Because I had "worry dolls" on the mind and also this family's tragedy, I thought I'd try a little boy doll.  He came out pretty cute.  


I ran out of the regular thickness of pipe cleaners and started using some thinner pipe cleaners. I liked them even better, especially for the smaller dolls.

Here is a sweet babywearing mama and baby doll in a ring sling.  The baby came out so cute.  I decided to leave them without faces.


The beads I purchased were completely unfinished wood.  I used an all purpose sealer to prevent bleeding.

Saturday, October 4, 2014

Little Friend and Preschool

The youngest began preschool this fall and at first it was the best thing ever.  Soon it became not the best thing ever.  Then there was even crying.  I don't believe anything changed about preschool, I think the reality set in that this is a reoccurring thing mostly without mommy.

The last time we had a preschooler; pretty much the same thing happened.  I decided to make her a little friend to go along to school and keep her company.  Sydney's little friend is still kicking around, but requires a pocket.  Kessa doesn't often have pockets.

I wondered if I could make a tiny little friend and it could hang around her neck.

In my searches for the Waldorf pocket doll pattern I had used for Sydney, I found pipe cleaner dolls.  I had pipe cleaners and small beads that were head like.  Even though this little doll would be less soft and cuddly, she would not get lost.

Using the bead as a guide, I just folded together the pipe cleaner to form a small body.  Then I traced the body to make a one piece suit out of felt.  A little hat with a stripe was added to cover the head.  Finally I added a jump ring to the hat and purchased these Magic Silkies Necklace Cords.  I liked them because there was no pinchy metal near her neck and if pulled hard enough, the necklace would come undone.

The Little Friend was working pretty well.  I made sure to fill up Little Friend with love and hugs and then Little Friend would give them to Kessa as needed during school.  I also made a little bracelet for her and a picture book of all the things she likes about preschool.  The last page of the picture book has a picture of us together with the words, "Mommy always comes back."

One day we couldn't find Little Friend!  In the 15 minutes before we had to go, I quickly made a new Little Friend with just hot glue and thread on the jump ring and hoped she'd stay together until I could sew her better.

Apparently when our Little Friend is not heading to school, she needs a sleeping bag.  I used my sewing machine and some polyfil and made little sleeping bags for many Little Friends.


After our emergency, I thought I'd try another Little Friend with a suit better pattern.  Using one piece on the fold works better.  I like the tiny heart stitched onto the orange suit.  The orange Little Friend has some hair too.

 
I also purchased more "head" beads and tried out different sizes.  This led me to try wrapping the pipe cleaners with embroidery floss for the girl in yellow.

Sunday, February 2, 2014

Sawtoothed Star and Colonial Days

The fourth graders have a Colonial Day at school and parents volunteer to help kids experience what life might have been like.  There were many different sessions for kids to chose from. They could make butter, create and play colonial games, do stenciling, tin punching, doll making, and my session on quilting.

A star block was not something I had made before. I had a mini quilt with wonky star blocks to show, but I also wanted to show a traditional saw toothed star block. I found a tutorial with a trick to make four flying geese at once.  


I had offered a quilting session when my first child had been a fourth grader and learned some interesting things along the way. First of all, quilting was not really done very much initially. Life was too hard to have time to quilt. When quilting was being done, it was more of whole cloth quilts, applique quilting, and then Medallion quilts. I shared information about each of these styles and provided 6" square quilt sandwiches for each student. 

In doing my research I also learned about some typical sewing projects from that time.  Most girls did an alphabet sampler.  Another interesting thing I came across was the pocket.  Pockets were not sewn into women's garments.  A pocket was made and tied around the waist.  It was accessible through an opening in the woman's skirts side seams.

Both times I did this, I provided examples and the kids seemed to enjoy coming up with something to applique to their quilt sandwich.


 It was interesting that many kids this year appliqued their initials.  Maybe they were thinking about the alphabet samplers.


Sunday, September 1, 2013

Mended Fabric Organizer

Due to the fact that backpacks are not allowed in school, my son keeps trying out different methods to stay organized and carry all his necessary things along.

This year, he plans to reuse this fabric accordion organizer and tuck his agenda in the front. This was what he did other years which caused the elastic to rip off and the button to pull out. 

I bought some new silver buttons and a flat black button for the reverse side. Thin elastic would work for the front and back. 

The buttons sewed together better than I expected.  I thought it might be hard to get them attached to each other through the firm material and still be held together tightly. The elastic tucked into the existing layers.  I just heat sealed the ends first. Everything was sewn by hand and I hope I put in enough stitches that it will last. 

For the back, I added elastic in a "V" to help hold his pencil case. 

Tuesday, June 11, 2013

Preschooler Sewing

My youngest is three and she likes to be involved in everything we do.  She has done some hand sewing before, but likes to have me hold the fabric for her. When I was at the store recently, I remembered to look for an embroidery hoop for her.

We tried out the new hoop today with a scrap of muslin. She still wanted me to hold the hoop, but we both were much less likely to get poked. 

It was a perfect little project. We used fairly short strands of thread and changed colors frequently. 

She enjoyed making some x's and making different length stitches. The hoop is 4" diameter. 

Sunday, May 19, 2013

A Girl Scout Quilt Story

Our Brownie Girl Scout Troop was doing the journey A World of Girls.  In it we talk about how stories are a big part of our world and how they can be told in different ways.  One way is through a quilt.  It was suggested that each girl think of her strength and depict it on a quilt square.  Then together the squares tell the story of the girls in our troop.

Of course this was a project that resonated with me.  I gave each girl a 7" square of muslin, showed some examples and gave them felt and fabric markers to use.  I loved their ideas and how they brought the ideas to fabric.  I told the girls that I would put the squares together for our end of year ceremony and then they could take them home afterwards.

I added a second 7" square of muslin to the backs with serging, then basted the squares on a bigger piece of fabric.  I intend to separate the squares after showing them off at our ceremony.


Friday, March 8, 2013

9 Year Old Birthday Party

"9" Birthday Shirt
My daughter's ninth birthday was rapidly approaching. I sat down with her to plan out a party. Her first choice was a sleepover party, but I decided we all are not quite ready for that. Sydney suggested make your own pizzas, doing their nails and some crafts. I added decorating cupcakes. We took a trip to JoAnns to get ideas for crafts. She chose a felt sewing kit as an idea and making personalized name bracelets.

We scheduled the party for a Sunday afternoon through dinner time. As the four guests arrived, we started with the cupcake decorating. My daughter and I had prepared buttercream frosting and mixed a few colors. We set up purple for frosting and a few decorating bags. Some girls spent a long time decorating while others stuck to more simple designs. I set the cupcakes aside on a tray for later.

Next we made pizzas. Each girl received a mini pizza shell on a dinner plate. I had many toppings and tomato sauce. The majority just wanted cheese so that was easy.

letter beads, SydneyWhile we waited for dinner, it was time to make bracelets. Each girl got a wire about twice as long as needed. We had letter beads and many different colored glass beads. A small paper plate kept beads from rolling everywhere.  Once they were done, they headed to the basement to play Just Dance while I attached the clasps.

Then it was time for pizza!  The girls enjoyed their custom pizzas and chatted about what to do next.  We still had nails to do and another project.  Sydney explained the choices.  It was decided that nails were next!

We have a decent collection of polish and nail art accessories.  Some girls felt very comfortable doing their own nails, while others wanted some help.  My daughter and another asked for leopard spots, so I did those.  Another wanted black polka dots, I helped with that too.

After the nails were dry, they played a bit more, then we had the cupcakes.

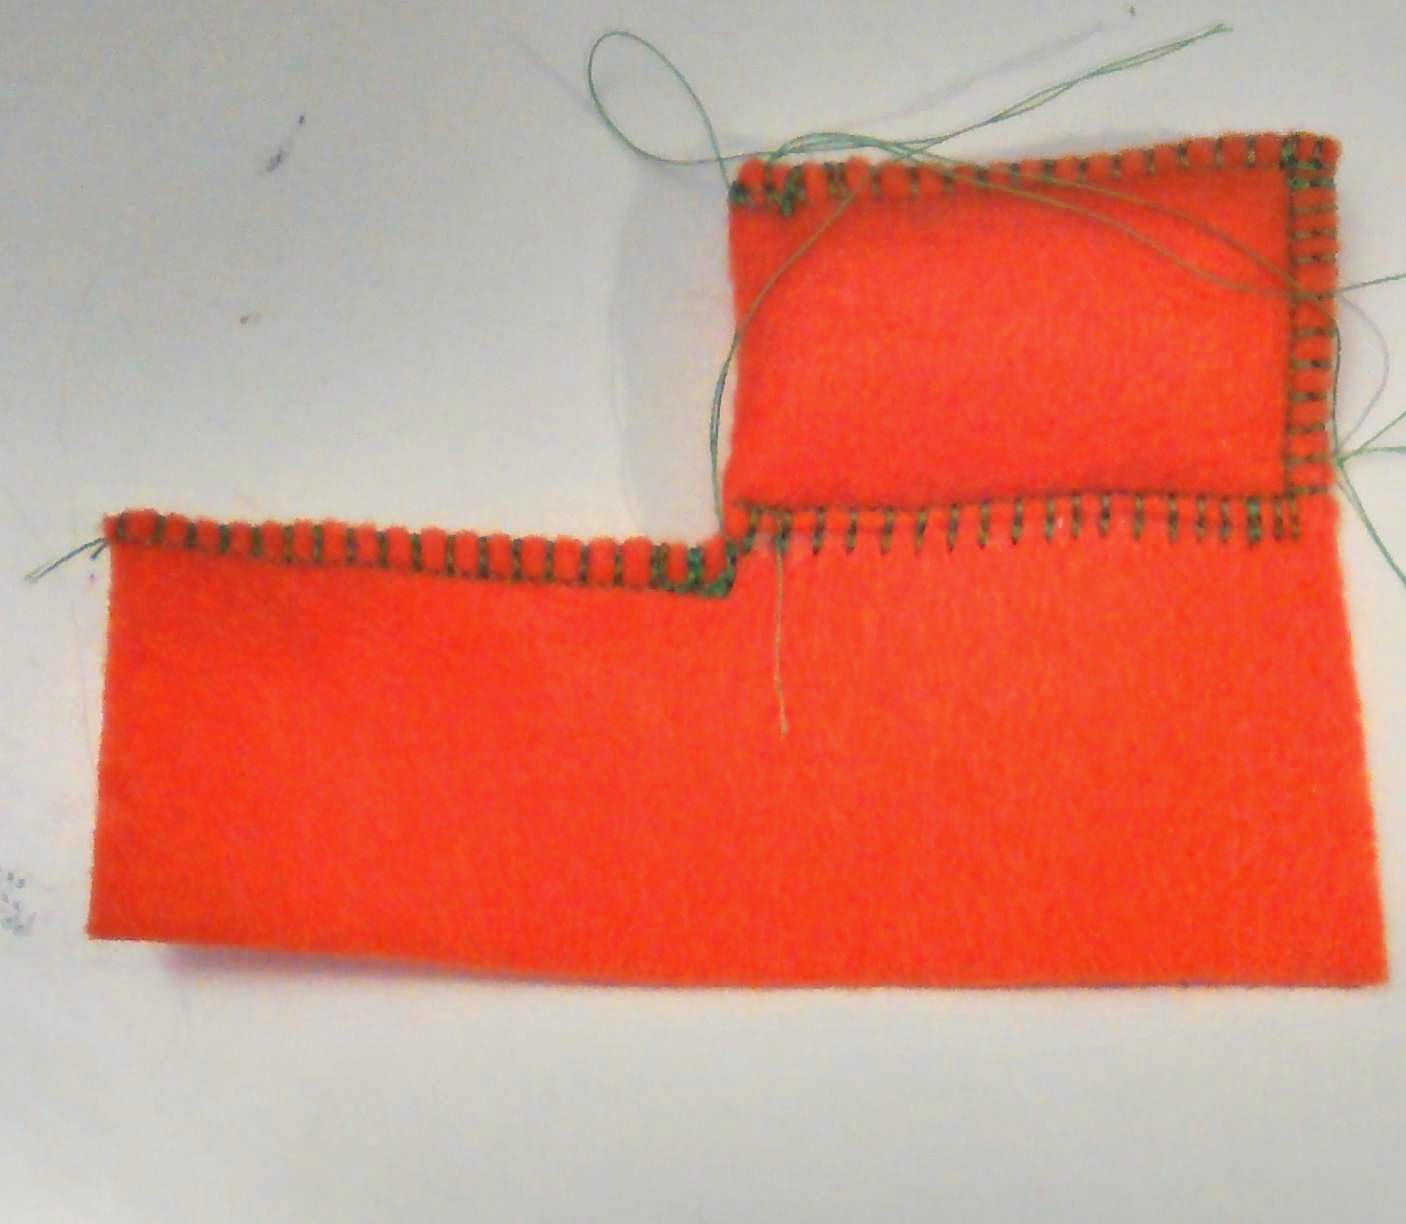
Finally, we moved onto opening presents and nearby we had the last craft project set up.  These nine and eleven year old girls were quite self sufficient.  We had felt, printed felt, embroidery floss, ribbon, and jewel stickers.  My daughter planned to make little layered squares with her initial on it.  I also made up an example of a tiny tote bag with a ribbon handle.  Most of the girls made the little totes.  It was also nice to see the experienced sewers helping the less experienced.
letter, initial, mini tote bag for doll

Our party was three and a half hours long and it was just right.  I wasn't sure if we had too many sit down activities, but for this group, it was the perfect party.  The two little breaks when they went in the basement and had some free time seemed to balance it all out.

Friday, February 8, 2013

Hair Streamers

My daughter and two other girls are planning on doing a hula hoop routine for their school's talent show.  I helped them with the hoop choreography and shopped for matching tank tops.  We talked about all the girls wearing high pony tails for the routine and maybe having a ribbon in their hair.  I checked out my ribbon stash to see if I had coordinating colors.  Because I had created quite a stash for my hair bows, I had all kinds of options!

Green & Black Hair Streamer
I chose different widths and colors and even added a organdy white ribbon in the mix.  They really are straightforward to make.  First, layer the ribbons, then stitch through all the layers in the middle.  The next step is to wrap the thread around the middle a few times to cinch it together.  Finally add the hair band and a small 3" ribbon which has a single knot in it.  I also used a flame to melt the ends a bit to prevent fraying.  Sewn all together it is quite secure and I'm sure will look great!


Friday, November 2, 2012

Gabby the Giraffe

felt giraffeMy young, sensitive preschooler was watching an episode of her favorite show, Doc McSutffins when she stopped it mid-show.  It was the episode called "Arcade Escape" and my daughter was upset that the giraffe was ripped.  She said it over and over.  I suggested we could make a little giraffe and stitch it up.

Together we found a template for a giraffe and then went back to the show to decide on the details for the felt giraffe.  We finished the show and saw that Gabby the Giraffe does indeed have a rip or an open seam and Doc McStuffins and Lambie are able to fix her right up.

It was neat creating felt details for the giraffe to match the tv character.  My daughter helped decide which colors to use for the body and spots.  We also agreed on orange stripes on the giraffe's legs.

Gabby has a lot of details, so we started sewing them on first.  For younger children, sewing the details on makes more sense than using glue.  Once we starting sewing around the edges and adding filling, I could demonstrate what had happened to Gabby in the show.

It was disappointing that it could not be completed in one sitting.  We went off to bed with a few safety pins holding Gabby together because done or not, she is already loved very much.  Then in the morning, I was able to complete Gabby the Giraffe.

Tuesday, April 3, 2012

Felt Easter Cookies

bunny, egg, chocolate chip, sprinkle felt cookiesA friend of mine really liked the felt cookies I made and asked if she could order some from me. I said sure!

Easter is right around the corner so I offered some Easter themed cookies in addition to the round ones I had made before.

I found the egg and bunny patterns at the Moody Fashionista blog.

I think the egg is my new favorite.
Kessa delighted with her new egg cookie

Friday, September 30, 2011

Good Turn Mouse

For the first Girl Scout Brownie meeting of the year I was looking for a fun project. I found this little poem about the Good Turn Mouse:

This saucy creature is a mouse
Most mothers won't let one in the house
See, this one it has quite a tail,
Each Girl Scout made one without fail.
Take it home and help all week,
and for good turns you must seek
for every good turn that you do
tie a knot in the yarn...make quite a few.
Remember why each knot you tied
and how much to help you really tried
and then next week, please take your turn
to tell us all, so we can learn...
just what you did to help at home
a ready helper you have grown!

I looked at Google images for a felt mouse pattern to sew. I settled on an almost circle that is folded in half and stitched with embroidery floss.

I started with beads for eyes, added little ears, and finally stitched the body from nose to tail leaving the tail long for knotting.

For the girls, I decided to prep the project for them so they would be able to finish in the time allotted and the project would not feel too hard for them.

I cut out all the mouse bodies and ears. Then I sewed on the mouse eyes and added a threaded needed with coordinating thread. I made up directions with sketches and the steps.

The group of second grade girls enjoyed the project a lot and were very excited to do the hand sewing. They did need a fair amount of help and it was great to have a few extra adults around. Everyone finished their little mice and took them home to keep track of all their good turns for the next two weeks.

Thursday, November 20, 2008

Hair Bows

After noticing in some pictures that Sydney's bangs naturally separated themselves, I encouraged her to grow them out. Finding the right hair accessory to reach that goal took a bit of time.

But we did find some little clips at Target. After looking at them carefully I decided that I could make them myself and Sydney could have clips to match different outfits. I found lots of resources for making hair bows and found that the little clips were called alligator clips.

Sydney got lots of compliments on the hair bows and I decided to make even more to sell.

Here is my big collection!

Sunday, October 19, 2008

Sewing Box

I found myself doing more hand sewing while creating hair bows.  I thought it would be great to have a little box to bring around with me and carry my supplies.  I looked at sewing boxes and they all seemed to be bigger than what I wanted.  I found a cute little box at Hobby Lobby, but it didn't seem finished on the inside.  The price was right, so I bought it and wondered about lining it.  I took some of my favorite fabric leftover from a sling and cut some cardboard for the lid, glued the fabric on and glued it to the lid. I thought I'd make a few holders for my scissors and also my stitch ripper.  I sewed elastic in and then I just tucked down the raw edge and quickly glued it in around the top edge.


Thinking ahead to Christmas, I made one for my daughter too and accessorized the box with pink scissors, cute pins, and a custom matching pin cushion.