Showing posts with label Baking. Show all posts

Sunday, October 6, 2024

Morning Glory Muffins


I had discovered Morning Glory Muffins when I was looking for carrot cake recipes. It intrigued me because I had never heard of them before. The combination of fruits and veggies sounded delicious. I perused some recipes and made some modifications. This is what I ended up with.

Can be made in a bowl by hand.

Combine 

1/3 cup mashed banana (1 small banana mashed on a plate with a fork and then measured)

2 TBSP of olive oil

1/2 cup applesauce (1 snack cup of unsweetened applesauce)

1/3 cup of pineapple juice (from 8 oz of crushed pineapple)

1 egg

1/4 cup of brown sugar

2 TBSP of honey

1 tsp of vanilla

Mix well then add

1 cup of wheat flour

1 cup of all purpose flour

1/3 or less of ground flax-seed and chia seed mix (last batch I used 1/4 cup of flax only and like it)

2 tsp of baking soda

2  tsp of cinnamon

1/2 tsp of ginger

1/2 tsp of all spice

1/2 tsp of salt

Mix just until combined, then fold in 

1 cup of grated carrots (some recipes have 2 cups, 1 is fine)

1 cup of grated apple (can substitute applesauce)

1/2 cup of raisins

1/2 cup of crushed pineapple

Spray muffin pan and fill most of the way with a full ice cream scoop.

Bake at 425 degrees for 5 minutes and then reduce the oven to 350 degrees and bake for another 15 minutes or so.

Last time I baked at 375 for about 15 minutes.

These muffins are moist and have a great flavor. I do detect a hint of banana, but it doesn't take away from the other flavors.

One time I was out of apples and wondered about using chopped, fresh cranberries. I was hesitant and decided to use applesauce, but also just add cranberries to two muffins (1 TB each). The cranberry flavor was muted, but a nice addition.

Yielded 12 muffins and 1 small ramekin.

Friday, April 19, 2024

Chocolate and cinnamon/cardamon twists (buns)

Every Christmas morning growing up we would have cinnamon buns. As I started my own family, my mom or more often my dad would deliver my mom's cinnamon buns. Her recipe is actually called cinnamon twists. I enjoy experimenting with recipes and not everyone at my house likes raisins. I came across a King's Cake recipe that reminded me a lot of the cinnamon twists. The shape is made differently by rolling and braiding additionally the filling adds flour to the butter, cinnamon, and sugar mixture. I made the King's Cake a couple times as the recipe is written. I wanted to try chocolate filling and found a recipe for Chocolate Sweet buns  and tried twisting them after I rolled the swirl and that wasn't quite right. But they were tasty.

This time I decided to make the King's Cake recipe, make half the filling cinnamon with cardamon and the other half chocolate. I also wanted to twist the dough and followed the old twist recipe by adding filling to the center third of the 10 x 16" rectangle, then folding over the top third. Then the other half of the filling is added on top of the folded part which finally is enclosed by the last third.

Like other cinnamon bun recipes, the dough is divided into twelve pieces, in this case strips, which are twisted and then the ends are pinched together. 

When I made the Chocolate Sweet Buns recipe above, it stated that chocolate chips or semi-sweet chocolate could be used interchangeably. In the King's Cake brioche with chocolate filling, I used 4 oz of semi-sweet Ghirardelli chocolate and found that the chunks of Ghirardelli chocolate melted completely while the chocolate chips from the previous attempt did not melt well at all.

Sweet brioche dough recipe adapted from the King's Cake recipe.

1 cup milk

¼ cup butter

Heat milk and butter in the microwave until warm or allow to cool until warm.

Add

1 ½ teaspoon salt

⅔ cup warm water

½ cup granulated sugar

1 Tablespoon bread machine dry yeast

1 teaspoon of cardamon

2 large eggs

2 teaspoons vanilla extract

Add one cup of bread flour at a time until 5 - 5 ½ cups have been added.

Knead until smooth. Dough will be a bit sticky. Allow to rest for 1-2 hours until doubled. Once doubled, punch down and knead briefly. Divide the dough into two. 

Stretch the first ball of dough and then roll it to a 10" x 16" rectangle. 

Add one-half of one of the fillings to the middle third, fold one third over, add the other half. 

Cut into 12 strips, twist and arrange on a lined cookie sheet. 

Repeat with the second dough ball.

Cinnamon filling (adapted from King's Cake recipe):

2 Tablespoons of butter melted

1/3 cup of brown sugar

half of a 1/3 cup of sugar

1/4 cup of flour

1/2 teaspoon of cinnamon

1/2 teaspoon of cardamon


Chocolate Filling (adapted from Sweet Chocolate bun recipe):

4 Tablespoons butter melted

1/2 cup brown sugar

2 Tablespoons flour

2 Tablespoons baking cocoa

1 teaspoon cinnamon

1 teaspoon vanilla

4 ounces of semi-sweet chocolate bar, chopped


Once twists are formed, allow to rise again covered for 30 minutes.


Bake at 350 degrees for 23 minutes. Tent with aluminum foil after 15 minutes.

While icing was included in both above recipes, we did not see a need for more sweetness. The sugar could probably be cut down a bit and still have a great flavor.

Heart twists

After cutting 12 strips, cut each again, twist and then rejoin into hearts. 


Monday, April 18, 2022

GF Chocolate swirl lower fat cheesecake

In order to repeat recipes, I often blog about them.  Everything is in one place and searchable.  I made this cheesecake last August for my parents' anniversary and didn't blog about it.  Fortunately, I had written myself some notes and was able to repeat what I had done.

I'm always looking for ways to make healthier desserts.  I did not change the sugar content for this recipe, but I did try to reduce some of the fat content.  This goes against most cheesecake recipes.  The recipes often specify using full fat cream cheese and sour cream.  I have had success making mini cheesecakes with the neufchatel before and knew it would work out.

I found recipes by Sally's Baking Addiction which were similar to what I wanted to try and I just made a few changes along the way.  Additionally, I needed to make the cheesecake gluten free for some of our family members.

*All ingredients must be room temperature*


Recipe
for the crust
20 gluten free Oreos crushed
3 TB butter

After combining the oreos and the butter, press mixture into a greased 9" spring form pan which is also wrapped in 18" wide heavy duty aluminum foil.  Bake at 350 degrees for 8 minutes.

Cheesecake recipe
3 - 8oz blocks of neufchatel cream cheese 
1 cup of sugar

Mix the cream cheese and sugar on medium for 3 minutes

Add 
1 cup of plain fat free Greek yogurt
2 tsp of vanilla

Mix until just combined.

Add eggs one at a time and mix on low.
2 eggs
2 egg whites

Separate out 1-1.5 cups of batter and add 2-3 squares of melted Ghirardelli baking squares.  I used 60% semi sweet Ghirardelli baking chocolate and followed the microwave melting chocolate.  The chocolate batter is a light chocolate color.  Today I used 1.25 cups of batter and 3 squares of chocolate.

In order to get the swirled pattern, I added blobs of both kinds of batter and swirled them with a knife.  My pattern today was different from last time.  There may be a better method to creating swirls.

I did follow the baking instructions with the water bath and used a 10" x 14" glass baking dish.  The pan rocked a bit inside the baking dish,  I simply created a small wedge out of extra foil to place under one edge.  The extra wide foil is very important in order to cover the sides of the spring form pan.  The cheesecake baked 60 minutes in a 350 degree oven and then I turned off the oven and opened the door slightly for another 60 minutes.  When the baking is done, the center still has a 2"-3" wobble.


To be served along with the cheesecake, I provide a cherry sauce using 2 cans of unsweetened canned cherries.  I followed the recipe from Oregon Fruit for cherry pie filling.  Whipped cream in a can was also available.

The next week I made some minis and swirls the chocolate itself in the batter.  Different effect and slightly different taste.  I think adding chocolate to a smaller amount of batter might be worth trying.
Mini spring form pans, set of 3 - baked 30 mins, then added some time and lowered temp
Mini 12 cavity cheesecake bites - baked 17 minutes
Baked them together at 350 degrees.  The mini pans were wrapped in foil and in a water bath.  The bottom of the mini pan was wrapped in foil (may be unnecessary) and probably benefited from the water bath next to it.  The recipe from above was the right amount for 3 mini pans and the 12 cavity pan.

Center mini cake wrapped in plastic wrap on a small cardboard circle.  Minis from the pan placed in regular sized cupcake liners for presentation only.

4/8/2023 - Made graham cracker crust and strawberry swirl cheesecake
I used one 7.5 oz box of Pamela's gluten free graham style crackers processed in a food processor with metal blades adding 5 TB of melted butter at the end. Bake at 350 degrees for 10 minutes.

For the strawberry swirl, I used about 
4 cups of frozen organic strawberries
4 tsp of cornstarch
2 tsp lemon juice
2 TB of water
Cooked on the stove until soft and mashed with a potato masher.

After baking the graham cracker crust for 10 mins, I added half the cheesecake batter and some dollops of mashed strawberries and swirled them. Then I added the other half of the batter. The second half did not cover the swirls. I then added more swirls on top. The large glass pan and water bath worked well again.

There is more than a cup of mashed strawberries leftover to add as topping or to eat with yogurt.


Tuesday, February 22, 2022

FACS bread recipe


FACS (Family and Consumer Science) is the new version of Home Ec.  Due to the pandemic and still not eating together in the classrooms, they have become very creative with their cooking and baking.  Bread was the latest project for 6th grade.  First my daughter needed to fill our a survey about what ingredients we might have at home.  I imagine if we were lacking items, they would be sent home as well.  We have a well stocked pantry and received a gallon sized ziplock bag with the recipe, two small foil pans and a packet of yeast.

The recipe is called Bread in a Bag.  I discouraged my daughter from using the bag for mixing, but it's a creative idea.

Ingredients:

3 cups of flour, we used bread flour

3 TB sugar

1 package of rapid rise yeast (2.25 tsp)

1 cup warm water

3 TB oil, we used olive

1 1/2 tsp salt

Directions:

Combine 1 cup of flour, 2 TB of sugar and the yeast.

Add 1 cup of hot tap water.  Mix.  Allow it to rest for 10 minutes.

Add 1 cup of flour, 3 TB of oil and 1 1/2 tsp salt.  Mix well.

Add last cup of flour and mix well.

Knead dough on lightly floured surface for 5-10 minutes or until smooth.

Divide the dough and place in the 2 greased mini pans. 

Cover with a towel and allow to rest for 30 minutes.

Bake at 375 degrees for 25-30 minutes.  Both times, our loaves were done closer to 20 minutes.

The recipe calls for all the mixing to be done in the ziplock bag as squishing.  That would work, but we used a stand mixer with a dough hook.  She did enjoy kneading the bread by hand.

This recipe is quick and very easy.  My daughter was able to make this bread by herself.  I only supervised her taking them out of the oven and checking for doneness.  The mini loaves went pretty fast and it was determined that she would need to repeat this project.  For round 2 I suggested she try braided bread instead.  This recipe worked very well again in a braided form on a flat pan.  Kudos to the FACS teachers for providing a simple, quick, and tasty recipe!

Saturday, August 13, 2016

50th Anniversary Cake

My parents were to celebrate their 50th wedding anniversary and my sister and I wanted to recognize the milestone. Earlier in the year my family took a big trip togther to celebrate. I started thinking about a cake at the minimum. I hadn't remembered that my parents had a square cake for their wedding, but when my sister started pulling photos for a slide show of 50 years, I was able to see the cake.
My sister and I also planned to have a cake celebration after my parents' church service, so I knew I would need to have cake for about 100 people. 
My first impression of the cake was that it was very ornately decorated. I wasn't sure how much uninterrupted decorating time I would have, so my main focus was on the roses. I didn't have a rose tip or a flower nail, so I started there, even before making the cakes and was able to make 10 buttercream roses which I refrigerated. 

I looked at square cake pans and figure out how much cake I needed. I found great tools out there for how many cups of cake batter for different sized pans. I decided to use devil's cake mix and white cake mix and instead of the directions, I added just under a cup of vanilla Greek yogurt, 2 egg whites and 1 cup of water. Both mixes turned into perfectly moist cakes that baked level using the guidelines for 8" square cakes and 16" square cakes. I ended up making the four cakes separately. First the 8" and made some cupcakes with the leftover batter, then another 8" with leftover cupcakes. Then I make the 16" cakes using two boxes of mix each and had a bit leftover each time too. 

After the cakes cooled, I placed each cake on a cake board and wrapped them in plastic wrap. This sort of wasted some cake boards, but did keep my cakes level and prevented cracking when handling them. I cleared off and cleaned my top shelf of the refridgerator for the cakes knowing I would need a big space for once they were assembled and frosted. 

I spent some time watching videos and looking at tutorials for stacking cakes and frosting. I decided to start frosting the two 8" layers. One video I liked in particular was with Alan at Global Sugar Art. One thing he did differently was to use a lot of frosting on the top and sides (applied with a decorator bag) and then take off the excess. I used angled spatulas which were great and also a pastry scraper which also worked well. I also already had a plastic cake turntable which was able to hold the weight of all the cakes. 

The 8" white cakes sat on one 8" cake board and were layered with buttercream frosting. After frosting the 8" layer, it went back in the fridge and I went to work on the 16" layers. The devil's cakes sat on a 14" foil covered sturdy cake board with some frosting to stick it in place also layered with buttercream frosting. 

Once the cake stacking started happening, it became apparent how heavy the cake was getting. I had already planned on using dowels under the 8" cake with it's cake board. I bought 1/4" dowel from the cake decorating department and needed to cut them down. I measured one dowel in the cake and cut four. I read sanding can be a good idea too to minimize splintering in the cake. I did wash and dry the dowels afterwards. 

It was helpful to have the extra cake board I used for wrapping the cake layers individually and used that to figure out where the 8" layer would sit on the 16". I placed the extra board down and made marks with a toothpick. 

Once the 8" cake layers were on the 16" layers, it was time to decorate and make more frosting. I placed the big cake on my shelf in the fridge and hung a sheet of waxed paper up to keep it safe. 

For decorating the cake, I knew I had the roses. I also watched some tutorials which used the rose tip for making arches. another tip I picked up was to use half of a disposable cup to mark the arches. One more component I wanted to include were shells using a star tip. I did use the plastic cake turner I had and it seemed to hold all the weight well. The square cake was easy to decorate.

Finally I added a 50th cake topper I had purchased and I added extra roses on top. 


Other things I researched were how to transport the cake and how to cut the cake. I found a box we had and was able to slide the cake in one end and then make a card board barrier so it couldn't shift. Having the square cake for transport and cutting actually seemed to make things easier. 


Thursday, October 30, 2014

Halloween Treats

Being able to make snacks and treats at home for preschool has been great.  I have very fond memories of my mom making special things for me in elementary school and it is sad that we can no longer provide homemade things.  But I am finding that in preschool and also the upper grades, any food is just fine.

Halloween has so much potential for great themed food.  I wanted to make sure I was providing food on the healthier side and did search around for ideas.  I found some cheese cut up using mini Halloween cookie cutters and went ahead and ordered my own set.  The preschool teacher suggested Pretzel dipped in chocolate and sprinkle "Wizard Wands" and included those as well.


Halloween Shaped Cheese

Treats, cheese, cookie cutters

Cheese and mini crackers ready for preschool snack.  I found these mini cups in the baking area designed as muffin cups.  They were perfect earlier this month filled with a couple tablespoons of vanilla yogurt for apple dipping.


 Banana Pumpkin muffins with mini chocolate chips


Pumpkin and leaf shaped melon

Shaped melon, pumpkin, leaves

Some items are for the kids for snack and some are refreshments for the preschool families who come to attend the Halloween parade.

Cutting the cheese and melon with the cookie cutters goes very quickly and was easy enough.  For the cheese, I cut long slices with a wire cheese cutter.  For the melon, I made sure to cut at an angle to yield wider slices.


Wednesday, October 29, 2014

Banana Pumpkin Muffins

Once again I sought out a pumpkin muffin recipe.  I hadn't found one worth repeating yet.  This recipe looked different because it used banana and I've always had good luck with banana.

I basically followed the recipe with a couple substitutions.  The second time I made it, I doubled the recipe and yielded 48 mini muffins (bake 11-13 mins) and 12 small regular muffins (bake 15-18 mins) at 350 degrees.

4 bananas
1 15 oz can of pumpkin
1/2 cup of applesauce/oil (almost all applesauce)
4 eggs
2 teaspoons vanilla

2 cups whole wheat flour
2 cups all purpose unbleached flour
1 cup brown sugar, packed
2 teaspoons baking powder
1 teaspoon baking soda
1 teaspoon cinnamon
1/2 teaspoon ginger
1/4 teaspoon nutmeg
1/4 teaspoon cloves

1 1/2 cup of mini chocolate chips (almost)

The first time I made these without chocolate chips and they are not very sweet and my family very much missed the chocolate chips.  The second time I added the mini chocolate chips and they are perfect.


*11/22/2020 
1 large banana
1/2 of an 15 oz can of pumpkin
1/2 cup of applesauce
1 TB of olive oil 
2 eggs
1 teaspoon vanilla

1 cup whole wheat flour
1 cups all purpose unbleached flour
1/2 cup brown sugar, packed
1 teaspoons baking powder
1/2 teaspoon baking soda
1/2 teaspoon cinnamon
1/4 teaspoon ginger
1/8 teaspoon nutmeg
1/8 teaspoon cloves

3/4 cup of mini chocolate chips, could use less, but the chips are well distributed.

Yielded 12 regular muffins.  The batter is moist, but not overly wet. The taste is more pumpkin and spices.  A nice muffin, but still not overly pumpkin.


Friday, August 15, 2014

Plum Crumble Dessert Bars

We have been enjoying all the summer fruit harvest. Lately we get cherries, peaches, blueberries, and melon.  When I saw these small black plums from a local grower, I thought we'd try them out.  They are perfect for snacking, but somehow they weren't getting eaten quickly enough.  Looking around for recipes yielded all kinds of interesting plum items.  Finally I settled on these breakfast bars. It's interesting for me to try new recipes.  I liked that the bottom of the crust is baked alone first.  I did question the need for so much butter!  And more butter mixed with the plums.  Next time I would play around with the quantities and see what else works well.  After trying this version, I would call them dessert bars as they are sweet and remind us of apple crisp.

Sunday, July 27, 2014

Chocolate Chip Cookies with banana and coconut oil

I've made chocolate chip cookies a few times substituting one banana for one of the sticks of butter. Today I remembered I wanted to try a half cup of coconut oil and one banana instead of any butter. The coconut oil is softer due to the summer temperatures, even in the a/c, so I didn't heat it at all.

I followed a basic chocolate chip recipe using two teaspoons of vanilla and one egg. I don't see many other variations. I did add one cup of oats, which I often do and did add almost two full cups of chocolate chips. I often only add one cup, but my helpers vetoed that idea.

I baked 10 minutes at 375 degrees and these have a very nice texture. The banana and butter variation seems more cakey. Banana only (no added fats) are very cakey. I think we will stick with the coconut oil.  As my daughter said, coconut oil is good for everything!  Even my feet!


Monday, April 28, 2014

Mini Anniversary Cake

My in-laws are celebrating their 30th wedding anniversary today and I wanted to do something to help celebrate.  I thought a mini cake might be fun to make.

I looked through recipes and settled on this "Best White Cake Recipe."  The recipe was easy to follow and made a nice batter.  For my three mini springform pans,  I made up half a recipe.  I had a decent amount of batter leftover and filled 7 square mini cupcakes too.  The mini springforms required almost the full amount of time suggested in the recipe.  I started checking at 15 minutes, but it needed about 25.  

After baking the cakes, I cooled them briefly, then put them in the freezer on a wire rack.  My goal was to trim down one layer to be smaller than the bottom layer.  The edges did get a bit crunchy as one recipe reviewer mentioned, but it seemed ok.  There wasn't any crunchiness on the mini cupcakes.

I used the buttercream recipe at the same site. The directions were very specific and seemed to make up a nice buttercream.  It probably helped also that I cut up the butter in small pieces to allow it to warm to room temperature quickly.  I only had 6/8 of a stick left, so I cut this recipe basically in half as well.  

A little research told me that pearls are one symbol for the 30th anniversary.  I still had some pearls leftover from our Frozen themed cupcakes.  It seemed to work out for a quick cake, but certainly not my best decorating.

It was nice to find I still have some cute bakery boxes that fortunately fit the tiered mini cake perfectly.  We dropped off the cake and a card as a little anniversary surprise.

With the leftovers we sampled the cakes.  One tester felt that it is too sweet, everyone else felt it is a fine white/yellow cake.

Sunday, April 27, 2014

Aunt Gracie's Bread

The recipe for Aunt Gracie's bread has been in my little recipe box for many years, but I had never tried it. The recipe has a lot of variability.  I think that discouraged me from trying initially. I didn't want to make the wrong decision.

Finally, I looked around at other similar recipes.  It is simply a sweet bread with cardamon seeds. 

From the suggestions, this is what I chose.
3 cups of milk
1 package if yeast dissolved in 1/4 cup of warm water
3 TB of butter
2 eggs
1 1/4 cup of sugar
1 rounded TB of salt
1 tsp of cardamon seeds
9 cups of flour

Heat milk, add sugar, salt and butter.  Stir until dissolves. When lukewarm, add dissolved yeast. 
Add 3 cups of four and eggs, stir well. 
Add 3 cups of flour and stir well. 
Add last 3 cups of flour, one at a time mixing until flour is well blended. Add cardamon seed with last cup of flour. Knead until non sticky but shiny. Let rise two hours or until double in size. Punch down and shape into four braided loaves.  Loaves can be placed on baking sheets or in loaf pans. Let rise 2-2 1/2 hours covered with a towel until doubled. Bake 350 degrees for 30 minutes. 

I made four loaves.  Each had four strands for a four strand braid. Two went into glass loaf pans and two on a cookie sheet. They tasted great and just like my parents remembered. 


Wednesday, March 12, 2014

Blueberry Muffins

We thought we would make up some blueberry muffins and sought out a recipe.  I found one I liked, though I might enjoy tweaking it a little.  On its own, it's pretty good.  Certainly better the second day and very moist. There is no oil, just Greek yogurt, banana, and an egg.

For the flours I used 1.5 cup wheat flour and 1 cup of all purpose flour.  I didn't measure the bananas and used 2 medium bananas and frozen blueberries.

This recipe yielded 24 mini muffins.  I baked them at 325 degrees for 14 minutes.

My first tester said, blah. There is a hint of banana, but not as much as our banana muffins.  The blueberries seemed a bit sour and the muffin itself is not very sweet.  After a day, the muffins taste much sweeter and got much better reviews.  Our playgroup friends liked them too!  

Saturday, March 1, 2014

Egg Muffins

After seeing eggs being made in muffin tins a few times, I thought I would try them myself.  I'm not a big fan of eggs, but I thought my family might appreciate an easy egg dish.

These are certainly easy and very adaptable.  I loosely followed this recipe.

I ended up with 9 eggs in a big glass measuring cup for easy pouring.  I added pepper and garlic powder to the eggs.

Then I defrosted various veggies.  We had a pepper and onion mixture and also broccoli.

After spraying with Pam, I filled each muffin cup with some veggies and then meat.  This time I added sausage and cheese to the veggies and also made some with only ham and cheese.  I use my kitchen shears over the cups to cut everything into smaller bits.  The first time I made these I used 1 cup of cheese and consensus was that they could use more.  This time I used 2 cups and it felt like a lot, but got very good reviews.


After everything is in there, I slowly poured in the eggs.  The eggs fill in all the spaces and some needed a little more.


These baked at 375 degrees for 25 minutes.  I did use a knife around the edges before flipping them onto a cooling rack.  The clean up is pretty easy too.


After cooling for a minute, they start to deflate.  My husband has eaten them as leftovers warmed in the microwave and they are always good.  


Sunday, February 16, 2014

Gluten Free Cake Balls

For Valentine's week, I had thought I might make some cake balls for the teachers at my daughter's school.  Instead I had a sick kid and others signed up first.

On the weekend was a pot luck sledding party.  Cake balls it was!  I learned that a gluten free option might be welcome.  After perusing the cake mixes at Wegmans, I went with Glutino's Decadent Chocolate Cake.  The recipe itself called for yogurt as one of the add ins, my kind of recipe.  It also called for butter, eggs and vanilla.  I decided to use coconut oil instead of butter.

The cake came out nicely, but seemed a bit drier than what I usually do.

After the cake cooled, I crumbled it up into a bowl and added softened Neufchatel style low fat cream cheese.  I added a bit at a time and ended up with probably 6oz of the 8oz bar.

While rolling the cake balls, I noted they didn't seem as smooth as usual either.  After putting them in the freezer while the chocolate wafers melted, I dipped each in the chocolate.  They appeared a bit smoother.  Drizzling another color on top always gives such a nice presentation and hides many imperfections.  The pink seemed a little thick, so I added some of the leftover white wafers which helped.

Even though this mix yielded a square 8"x8" cake, it still make tons of cake balls!  I didn't count, but it was more than I expected from a smaller pan, I may have rolled slightly smaller balls too.


Monday, February 10, 2014

Chocolate Cut Outs & Valentines

The little one and I have recently joined a playgroup. Being almost four apparently means wanting to play with other children and socialize more.

With Valentine's Day approaching, I suggested having a little party complete with a Valentine exchange and decorating cookies. Another mom offered to make cookies also.  I had sought out a chocolate cut out recipe to try.  I'm not a big fan of sugar cookies, but hoped a chocolate version would be better. 


The recipe sounded easy enough and came out well. My family seems to like them. I think adding frosting will improve the taste further. My husband suggested they taste like the outside of a chocolate poptart. 

We found some really cute Valentine sprinkles at Wegmans.  We will do buttercream frosting and sprinkles for the kids. I may frost some with royal icing if there are cookies leftover.

For the Valentine's, I found an example on Google images of using a thumb print monkey with the words, "I like hanging out with you!"  Perfect for playgroup friends!  Kessa decorated the back with stickers and used her new "Kessa" custom rubber stamp.


Friday, January 17, 2014

Sachertorte for German Class

My thirteen year old son came home with a recipe for Sachertorte. Even after studying German myself for many years complete with two trips to Germany, I had never had Sachertorte. I guess had I visited Austria, I would have definitely tried Sachertorte.

The recipe looked tricky with many different parts.  The teacher had included a link to the recipe on Epicurious

 The number of ingredients wasn't too many, it was just the method of adding them together that was very specific. 

I did need a few ingredients that I didn't have on hand:  high quality bittersweet chocolate and apricot preserves. In addition, I also did not have a springform pan or a candy thermometer. 

I learned we had a week before the cake was due in class for a cake baking competition. I read through the recipe many times and looked at some of the reviews. Someone recommended watching the accompanying videos to really understand the steps. The day we planned to make the cake, I watched the videos. They were helpful and even a little different than the written instructions, especially for the chocolate glaze. 

The first step was to take the butter and eggs out and bring them to room temperature. After dinner, we started on the cake. I wasn't sure if we would have time to also make the glazes or not. We melted chocolate with a large bowl on top of a pot of hot water, separated the six eggs and got out the standing mixer. The directions were very clear at that point and familiar. Everything seemed to go well. As the videos states, I added everything slowly and mixed in between.  I used the butter wrapper to grease the springform pan, placed the batter in and finally baked in the 400 degree preheated oven.  I set the timer for 45 minutes and waited. We peeked in a few times through the window and I did check it with 3 minutes to go. But a few places on the bottom and sides did get too dark. In the video, the chef suggests a 375 degree oven and I wonder if that would be better. Or checking it sooner. 

The cake came out of the springform easily and because it is a dense cake, it is easy to handle and flip over with cooling racks. It didn't take too long to cool and before long I was separating the tall cake into two layers. I followed the video's suggestions for separating the cake scoring first and then cutting and turning the cake.  I used a serrated bread knife. Handling the layers was easy too. I didn't feel they would crack or fall apart. I decided to try to trim off the dark areas and that was easy too. I just went slowly and used my sharp, serrated knife. 

It looked like we still had time to make the glazes. We cooked up the apricot preserves with 2 TB of water. Spreading it on was easy. I didn't strain the solids like the recipe states, as it hadn't been explained in the video. I think we would have had less bumps on the final layer if we had been more careful about a smooth apricot glaze layer. 

As that cooled, we made the chocolate glaze. We followed the videos instructions for boiling the sugar and water first and adding the chocolate at the end. I'm not sure it ever got as warm as 234 degrees, but the sugar water mixture did start to make a small strand between my son's fingers, and after adding the chocolate, we did see it getting shiny. 

Slowly pouring the chocolate glaze on worked well to cover every inch of the cake. All the drippings on the parchment we did collect for making hot chocolate. It was recommended a small amount of glaze heated along with milk makes a nice hot chocolate. 

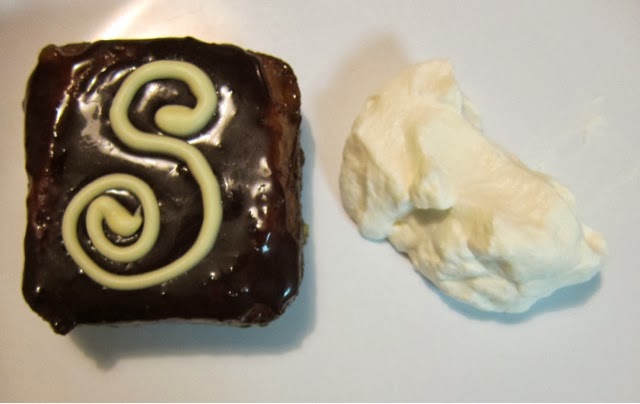
Finally we added white chocolate piping for decoration. 

Now we wait, the whole cake is going to school for the competition and extra credit. Hopefully we will be able to try it at some point, or we may need to try it ourselves!

The next day...
After getting nice comments and strong positive memories of Sachertorte, it seems wrong that I hadn't had the chance to taste it. Also, one local friend sounded like she might like to have some too. I knew doing the recipe again would go quicker. Also, I had purchased a set of three mini springform pans which would be fun to use. That would make it easier for giving one away as well.  
Making everything again did go quicker. A couple different things happened too. First when separating the eggs, the smallest amount of yolk got mixed in accidentally. I hoped it would be ok.  Unfortunately, the egg whites just got white and bubbly, they never became meringue.  I needed four more eggs to try again, fortunately a neighbor could help us out. Second try with the egg whites yielded perfect meringue.
I purchased a different apricot preserve which had less solids and better ingredients. I had missed it my first trip to the store.  
When I was making the chocolate glaze the second time, I think I was more patient after adding in the chocolate and allowed the mixture to get back up to temperature.  This batch of glaze seems even shinier and no cracks. 
Working with the smaller cakes was easier too. They cooled faster and I could cut by turning the cake on its side.  Because the chocolate glaze had gotten hotter, I don't think I allowed it to cool enough before pouring it on the cakes. I ended up needing to spoon some glaze back on the cakes from the waxed paper. 

Along with the three mini springforms, I made five tiny square cakes.  If I had more mini springform pans, I might have filled one or two more. I baked them about 27 minutes at 375 degrees. The tiny squares got a little too dry on some edges. The mini springforms seem perfect.

We made up some whipped cream for dipping and tested the minis, they have a nice flavor.


I did get a slice of the first big cake after traveling around school and it was pretty good.  I bet it is slightly overcooked, but not too bad.


The mini springform cakes were delicious!  I think they were baked perfectly.  The topping was better too.
 

Thursday, January 9, 2014

White Chicken Chili

Ground Turkey Chili was part of our regular rotation until the family seemed to tire of it.  I looked around for a white chili recipe.  After considering different recipes, I tried this one by Cooking Classy with minor modifications.

Beginning with a whole routisserie chicken pre-cooked from Wegmans saved some cooking time, but did take some time to prepare.  The whole chicken yielded almost 4 cups of chicken.

Into the pot went a bit of olive oil and minced onion and garlic flakes, then a whole 32 oz box of chicken broth, the chopped chicken, and green chilies.  The only spices I used were cumin, oregano, paprika, and black pepper.  After a bit I added the room temperature Neufchatel cheese sliced.  It did melt in nicely and gave the soup a creamy texture.  Per the recipe, I did mash up about a cup from the 2 cans of rinsed Cannellini beans with a potato masher.  Pre-heated frozen corn was also added.  Once ready to serve, we added shredded Mexican blend cheese.

While the chili was simmering, I started on the cornbread muffins.  I had tried some variations with the Jiffy mix, but tried a new mix, Wegmans Gluten Free Honey Cornbread Mix.  It has no added oils in the mix and also has fewer ingredients.  The instructions are to add one egg, 1/3 cup of oil and 3/4 cup of milk.  I added 1 egg, 2/3 cup of plain Greek yogurt, some skim milk to make up a mixture of yogurt and milk totaling about 1 cup.  I'm guessing it was about 1/2 cup of milk.  The mixture seemed dry until I added a can of creamed corn, then it seemed perfect.  Because of the additional ingredients, it yielded a bit more than the 12 muffins the box states.  I got 12 muffins and 16 mini muffins.  They baked 18 minutes for the regular size and 13 minutes for the minis at 400 degrees.  Everyone loved the muffins.  They came out moist and tasty.

The chili was enjoyed by everyone who tried it. It isn't spicy, but the green chilies do stand out.

1/17/2014 - Tried smashing more of the beans and added more corn ~2 cups.  I liked this version better.

Tuesday, December 31, 2013

Happy New Year Calzones

The kids were asking for pizza for dinner; I offered to make calzones because it had been a while since I made them. Long enough that I forgot how long to bake them.

I used my bread maker to make the dough. Two pounds of dough is split into eight balls for eight calzones. 

I used 3 cups of white flour and 1 1/4 cups of whole wheat flour and got no complaints about it being too wheaty. 
The rest of the recipe is 1.5 cup of warm water, 2 Tb olive oil, 2 tsp salt, 2 tsp sugar, and 2 tsp yeast. 

For fillings we had frozen broccoli, frozen spinach, frozen peppers, pepperoni, tomato sauce, and mozzarella cheese. 

I used a fork and knife markings to distinguish the different fillings. 

We brushed them with an egg and a TB of water mix. 

They baked for 20 minutes at 400 degrees.