Showing posts with label gift. Show all posts

Monday, June 16, 2025

Sunshine Gifts

 A while back when a young family member was having surgery, I found an idea for a "box of sunshine." This box included yellow items such as food, stickers, or other small items. It was fun to shop for yellow items that would fit in the box.

Since then I've gifted yellow items other times for different reasons. 

As the school year comes to a close, all the feelings are there. Kids are ramping up for summer, there are many end of year things to do, and teachers are tired. One new teacher has been counting down her first year of school and it seems like it's been a particularly stressful year. I thought she could use some sunshine.

Once again, I hunted down each aisle for yellow items. Some staples I've found each time included lemon flavored drinks, peanut m&ms, Juicy Fruit gum and Nilla Wafers. 

I figured we had a small paper bag at home, but unfortunately we must be out. I knew I could make a simple fabric bag which I have made before. I googled first to see if there was an even simpler idea to try. I basically followed this simple gift bag.

First I looked for yellow fabric and chose which had enough fabric for the pile of items I wanted to include. Then I cut it just bigger then my pile. Next I loosely followed the ideas of turning down the top edge, creating a casing (fold down edges and topstitch, then tuck under the top and bottom long edge and sew down to the bag) for the outside (I made one for the front and one for the back), and finally sewing the sides right sides together, then serging and boxing the corners. Because I had created two casings with openings on both sides, I could run two rows of ribbon to cinch it together.

Everything fit well into the bag and I think it's pretty cute.

Afterwards I had another teacher I wanted to bring some sunshine to. I created a mini tote with the leftover lemon fabric and added handles out of ribbon. That went together very quickly. Once again I used the serger and boxed the corners.

Monday, January 24, 2022

Zippered Pencil Pouch


I wanted to make a simple pencil case as a gift. I've made many of these over the years, but it seems like the last two years I've only made masks. I forgot what dimensions work well and overdid how much I took off the corners. My second attempt was too big and too floppy.

The second attempt


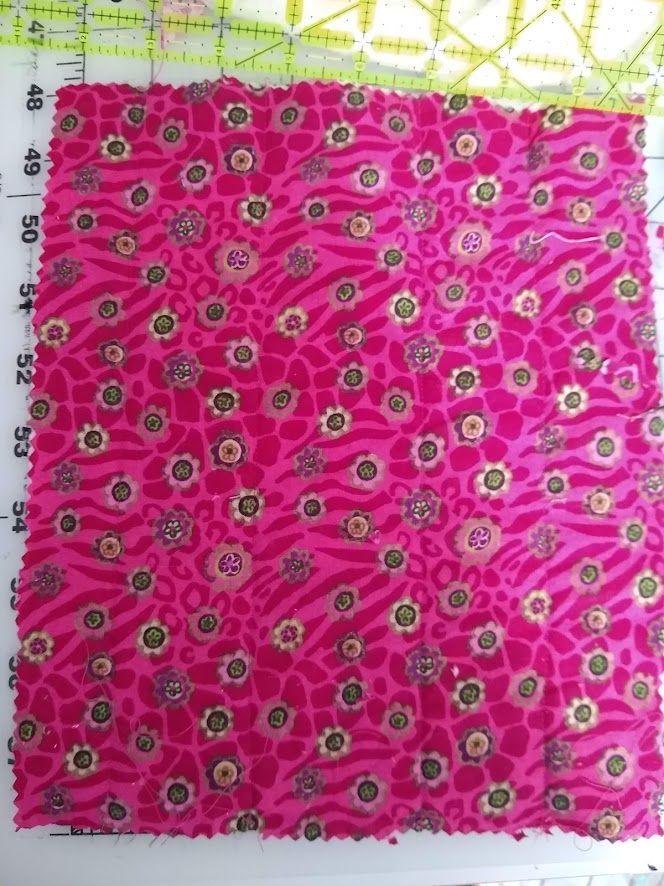
My goal of being quick and simple was long lost. I decided to use one of my favorites as a guide, but smaller. I cut 8" x 10" of heavyweight cotton, thin batting and a cotton lining, slightly smaller on the batting.  It's a tight fit for pencils. A bit longer would be better. I used a zipper foot and ½" seam allowances.


My goal of being quick and simple was long lost. I decided to use one of my favorites as a guide, but smaller. I cut 8" x 10" of heavyweight cotton, thin batting and a cotton lining, slightly smaller on the batting.  It's a tight fit for pencils. A bit longer would be better. I used a zipper foot and ½" seam allowances. 


First I took the three layers and sewed lines through all the layers. 


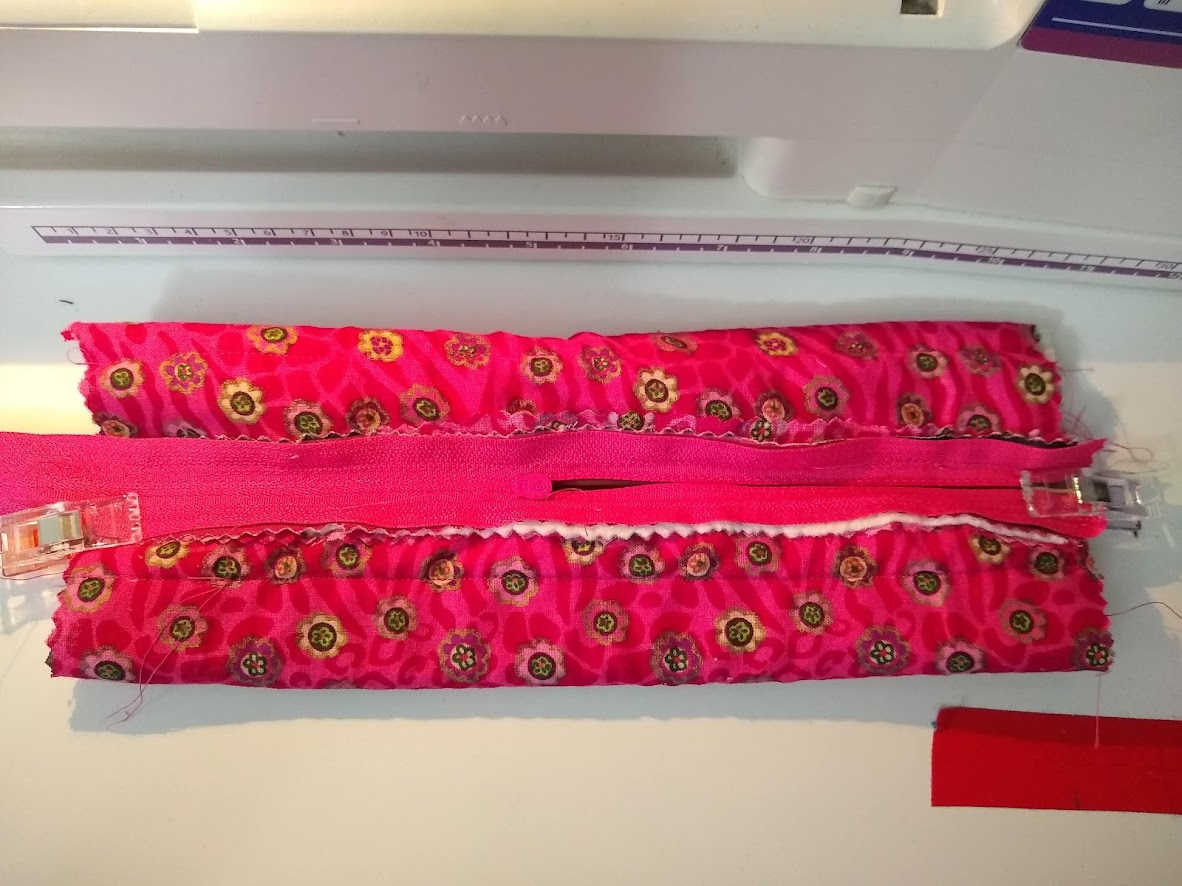
Then I installed the zipper right sides together on the right side of the heavyweight cotton using my zipper foot and adjusted the needle position. After doing both sides of the zipper tape, I topstitched. 

This style of bag is nice because of the way the seams incorporate the zipper. 

With the zipper half way open, center the zipper over the bottom with right sides together. 


Sew across the two ends and then create the corners.  I boxed all four corners and took 1” off.


Just big enough for a new sharpened pencil.


Finished size is about 8”.


Wednesday, May 3, 2017

New Handprint Quilt Done!

Handprint Quilt
I'm thrilled that this quilt went together so smoothly and quickly.  Sunday was a big sewing day and I also spent Monday afternoon.  Tuesday I took off and got a lot done with few interruptions.  I spent time planning of course and two shopping trips for fabric.  Tuesday evening and Wednesday were when I hand sewed the binding.

I ended up using almost all the fabric I got, so the amounts were pretty close to what I needed.

  • I had 6 accent prints (3 pinks & 3 blues) - 5/8 yd of each
  • The multicolor off white I had over 3 yards.  Probably 2.5 yards would have worked.  That was used for the front, the back, and the binding.
  • For the handprints, I used Kona ivory and had 2 yards.  That was perfect for 19 students with one mistake.  


I used a twin sized packaged batting and quilting thread.

The quilt size is about 48" x 60".

Back of quilt


Tuesday, May 2, 2017

New Handprint Quilt continued

I received the new handprints and got all of the top layer stitched together yesterday.


The next step is to make a quilt sandwich. The first layer down is the back, then the batting, and finally the top. With another mom's help we got the quilt sandwich pinned together quickly.


I planned to use my big quilting sewing machine to do free motion quilting. I often need to re-familiarize myself with it as I don't use it regularly. After changing the needle and cleaning and oiling the bobbin compartment, it was ready to go. Fortunately, the machine worked great!  Here's a little video of me doing the free motion quilting. It's like doodling on fabric.

Here's a close up of one of the hand prints quilted. As I worked, I read each name and and was thinking of each child and also of course of their teacher.


After quilting the layers together, I sewed on the binding.  I used a narrower 2.25" binding.


The final step is to hand sew the other side of the binding to the back side of the quilt.  It's almost done!


Sunday, April 30, 2017

A New Handprint Quilt

I am excited to be working on another special project for my daughter's teacher. Many parents came together wanting to do something for her and I offered to make a quilt like I had for another teacher who was retiring.

Step one was to get painted hand prints from the children. Fortunately two moms were able to do that before the weekend. I purchased coordinating fabric and today got to work putting it all together. Two students were missing on Friday, so we will hope to catch them on Monday.

I cut apart the handprints into 8.5" squares and cut strips of the coordinating fabric into 8.5" x 4.5" strips and 12.5" x 4.5" strips.

Next I laid out the handprint blocks and the coordinating strips.


Then I  pieced together the back of the quilt.

More progress is shown in the next blog post.

Tuesday, December 23, 2014

Mini Knitting Themed Wreath Ornament


I was inspired to make this little wreath ornament by seeing a larger wreath on an idea sheet made up with balls of yarn.

I found a small plastic ring I had used for baby doll carriers about 2" and wound yard around it with a few dabs of glue.

Then I took small beads and glued and wound embroidery floss around them to look like little balls of yarn.

Purchased small wooden beads went well with the cut toothpicks.  The bead hole was a little small so I needed to use a pencil sharpener to shave off a bit.

I added bells to make it more festive.

After making a few of these, I tried to just make a mini ball of yarn with the toothpick knitting needles which was cute too.


Monday, September 22, 2014

Super Hero Masks and the Pink Cape

After considering my gift offerings, I decided one more little thing would round out the gift and perhaps a mask was it. I printed off some templates and in addition to a cape, my four year old wished for a mask too.

There were many mask templates to choose from. This template looked good. I ended up printing two sets and trimmed one down a bit. I considered adding interfacing, but decided against it. I cut the two layers of felt and added 13" of elastic. I did add a tiny square of felt over the elastic edge before sewing it down. I sewed through the larger mask piece, the elastic, and the felt square. It seems secure enough. When creating the one for my daughter, I decided to add some sparkle to it with hot glue. Other embellishments at the corners would look cool too.

I've made capes before for my kids and as gifts, but somehow I hadn't ever made such a big and flowing cape.  I've often used one layer of a material that doesn't fray like knit or Lycra and didn't even finish the edges.

And maybe we have never taken our capes outside before.

The combination of the bigger cape, the outdoors and perhaps just enough wind made for the most delightful new plaything. The day before, Kessa had tried out the gifting one and had a ball. Well, once she had her own it was just the best. She raced around letting me take pictures of her and then she said she just wanted to play. I captured some of that too. Now we know, the right sizes capes are super fun. Now the ten year old has requested one...

Monday, June 23, 2014

Grocery Bag

End of year teacher gift ideas never come easily to me.  I searched around for some ideas and finally decided on a grocery tote. Mainly because I had just a bit of cute teacher fabric leftover from a Handprint teacher quilt I made last year and also because I see the value in fabric grocery bags.

I used a plastic Wegmans bag as a pattern.

Bag Parts
Front, back outside and 2 lining 16.5" x 13"
2 Side Panels outside and 2 lining 4.5" x 16.5"
Handles 2 outside, 2 lining 5.5" x 13" shaped and pleated
Loop 4.5" x 3"


First I started with front and back panels that were 16.5" x 13".  These were pieced in a basic log cabin pattern with 1" to 3.5" pieces.

Next I cut two side panels 4.5" x 16.5".


These four pieces went together to form the bag.  (Red side panel, pieced front, blue side panel, pieced back)


I formed the bottom of the bag by folding in the side panels into the bottom seam.  Here is what it looked like on the lining.


On the outside, the bottom looked like this.

For the handles, I followed the basic size and shape of the plastic grocery bag.  I cut a rectangle of 5.5" by 13".  I measured 2.5" in the center of the strap and also centered lengthwise.  With the strap folded in half, I started the curve about 3.75" from the edge and curved in to the 2.5" mark.  I copied this curve on the other side mirror image.

Need two straps, each with a lining.
Handles, turned and top stitched.


Handle position ended up having the inner edges of the handles 1.25" covering the side panels.  I put in a pleat because it seemed a bit too wide after all.  The finished size with the pleat was 3.5".


Next was a loop.  Cut at 4.5" by 3", then ironed in half lengthwise, each side folded in towards fold line and then folded in half.
Pieced Grocery Bag


Handles and loop is positioned right sides together with outside of bag.  Then I made a lining using the same dimensions:  two 16.5" by 13" panels plus two 4.5" by 16.5" sewing together (with opening for turning in one side seam) then folding in the sides into the bottom seam again.

Sew bag right sides together at top edges, flip, top stitch, and blind stitch lining opening for turning.


Sunday, December 8, 2013

Pillowcase Present

My daughter was invited to a birthday party. This particular child often requests donations instead of gifts for her birthday. I like to make a little something for her too. This year I thought to make her a pillowcase. I thought it would be a nice gift because they are a cosleeping family and that usually means your bedding is more neutral. But pillowcases are a nice way to personalize a shared sleeping space. Because I thought this child might really appreciate and understand, I purchased enough fabric to make two pillowcases. One will go to the birthday child and the second will be donated to the Conkerr Cancer project. Pillowcases are offered to hospitalized children. The children may choose one for themselves to use at the hospital and then take home.

Friday, November 22, 2013

Neighbor Farewell Quilt

There had been murmurings of a potential move for some time, but we never heard of any new jobs or move dates. Then just after Halloween we noticed a for sale sign with a sale pending.  As the month continued to fly by, I finally caught up with the mom and found out they were leaving in five days!  My daughter has spent many afternoons with their daughter and is sad they will move six hours away.

After hearing the news, I looked around the internet for a going away gift idea. One idea was a luggage tag. I liked that idea, but also wanted something with which my daughter could help. My next go to was a quilt. I wondered if my daughter would like that idea.  While my daughter slept, I was already forming a quilt in my mind. I hoped to find prints of houses, because we live in the same neighborhood and of bikes, because they ride bikes together and of dolls, because they both enjoy playing with dolls.

I needed something fast and easy.  I considered Road Trip pattern and Layer Cake Lemonade Pattern. Finally I found this Big and Tall pattern and decided it would be quickest to purchase the pattern. This would be my first quilt pattern purchased. 

The cutting for this quilt went quickly and the sewing went very quickly.  I decided to do nine blocks instead of the recommended twelve.  Each block has six components.  After we formed the blocks, my daughter and I spent some time rearranging them until the colors seemed mostly balanced.  After stitching together the blocks and noting that the quilt really goes one way, it seemed more rectangular than square and wider than taller.  The next morning, I decided to add a top and bottom strip of purple to make it more a square.

I had considered making houses for two of the front squares, but I also wanted to put everything together quickly.  I had found a wonky house pattern for paper piecing and studied it a bit.  Finally I decided to just wing it.  
I started with 3" wide door, a 3" x 3" window, and 3" strips to fill out the house.  I ended up trimming the middle and sides. The roof was next, I cut a triangle and then added the sky to one side, then the other.  Finally I added sky to the sides of the house and put it together.  The last step was to cut the house on an angle and add grass.
The first house was pretty big, for the second house I started with a 2" wide door and based everything else off that. I wanted it to appear that one house was close and one far away.

Surprising to me was that the piecing of the back took much longer than the front.  I used up scraps to frame houses and make up a 60" x 60" back.

For the "label" we just rubber stamped on the grass of the smaller house and hand wrote the date and location in permanent ink.


Thursday, November 14, 2013

Dresden Plates and Mug Rugs

A unicycle quilt has been getting new consideration lately. My first thought was that all those curves would be unpleasant, but my second thought was remembering some spoke like quilts I've seen. After checking in with some of my quilting friends, they reminded me that the wheel quilt is called a color wheel or a Dresden Plate. I actually found examples that were quite spoke like.

I hadn't ever made a Dresden plate quilt.  One example I saw used multiple fabrics in each plate. The spoke like wheel utilized striped fabric. I tried out altering the white star print's position and quickly realized it wasn't really working. I added a couple curved accents, but still not great. 


Another try yielded a more wheel like pattern. I kept the white accents in the same position and added a green solid for contrast. And added a second mini wheel.  Some Dresden plate quilts add the wheels and embroider them on.  I traced the curve, added a 1/4" seam allowance and was able to piece the backing onto the wheel. 


I still had mug rugs on the brain the next day after my Modern Quilt Guild meeting. We will be exchanging mug rugs at our December meeting. They do not need a holiday theme. I started considering leftover pieces from my sewing themed messenger bag. There wasn't much fabric left so I went with a log cabin pattern and added stripes on the side. I also made a pieced binding and quilted with wavy lines. After completing the mug rug, I wasn't sure I wanted to give it up, so I started another with a cool print. There was a tiny bit of the sewing themed print that I added to the back of the new mug rug. For interest I added a single strip of brown in the binding. Quilting again was done with wavy lines avoiding most of the words in the print.
Mug Rug
Mug Rug back