Showing posts with label Babywearing. Show all posts

Sunday, June 23, 2013

New Mei Tai for a Friend

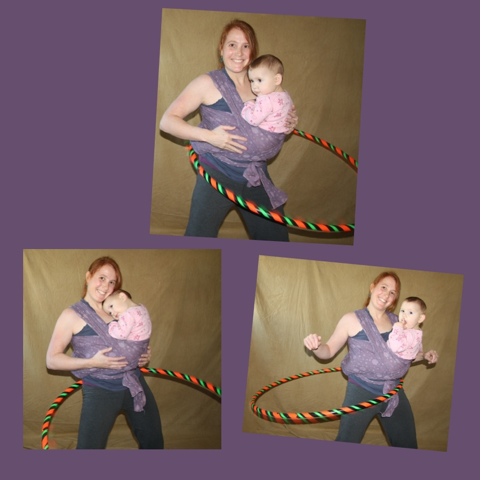
Quilted Mei Tai Baby Carrier
When I made my quilted Mei Tai baby carrier back in 2010, a friend of mine put in an order for whenever she might have another baby.  At the time, I couldn't imagine making another.  I had spent a good deal of time figuring out the pattern and also sewing while taking care of a young baby.  My friend just had her new baby and it was time to make the carrier.  I decided to take notes this time in case I ever needed to make another.

First I started with the quilting.  This would be the easy part.  I used my carrier as a guide.  I cut squares and strips that were 2.5", 4.5" and 6.5" and played around with the placements.  After making the mini quilt, I attached a panel of black sateen to the back and quilted through the two layers.

Next I added the borders.  I added 3" strips to the sides, then cut the curve.  Afterwards I added the top and bottom borders, also 3".

The straps dictate how much fabric I needed of the black sateen.  The straps were cut at 82" by 5.5".  I cut four straps and tapered each pair down to 3.5".  The taper started just about 28" measuring from the tapered end, was down to 4" at 24.5" from the end to be tapered.  I also added batting to the straps for padding.  The batting was 18" by 5.5", sewn into the side seams four inches from the top of the strap, turned and top stitched.

The hip straps were next.  One was 22.5" and the other 14.5".  These straps tapered too from 4" down to 2.75".  I used a 2" side release buckle.


Then I attached the hip straps and shoulder straps to the body of the carrier.  It's a little confusing attaching the straps because they go in backwards, but going slowly and checking regularly works well.
Lining up the should strap
Proper placement and orientation for the opposite shoulder strap
Once one row of stitching was holding the straps on, I pinned them to the front of the body and attached the back, pinning carefully and sewing slowly.  I left a small opening in the bottom.
Straps folded in ready for back
All pinned ready to sew the front to the back right sides together
After flipping everything right side out, removing pins and ironing, I sewed up the opening in the bottom by hand.  Finally I top stitched around the outside of the carrier body and also outlined the quilted panel.

baby carrier blue green


Monday, January 2, 2012

Hooping meets Babywearing

The one thing I always found a bit challenging with hooping is having a baby or toddler around. For one they can walk into a hoop and get hurt and secondly, they might just need to be held at the very moment that I want to be hooping.

As my baby has gotten older, I wondered if I could hold her a bit as I hooped. I first tried her on my shoulders. It worked ok, but she didn't always like it or feel secure up there.

Just recently she really needed me to hold her and I really wanted to hoop for a couple more songs.

My girls had been playing "puppy" with one of my baby carriers and it was still out. It is called a wrap and is just a long piece of fabric, almost six yards long and close to twenty inches wide. I wondered if I could actually tie my toddler up high enough and hoop at the same time.

It did work and I got a great workout. She weighs twenty-six pounds and I certainly felt it!
Hooping Meets Babywearing

I thought I'd write down what I did in case any other hoopers find themselves really wanting to hula hoop with a toddler. Please always use your best judgment when considering Babywearing while hooping.

Find the center of the wrap (1) and place it high on your chest (2).

Bring the long ends to the back and cross them behind your back (3) and then over each shoulder (4).

Pick up your child (5) and place them in the center of the wrap (6) while still holding on to the child.

Grab each long end from over your shoulders and hold them tight while also keeping an arm on the child (7).

Cross the wrap over the child's back (8) and under their legs towards your back. Secure the wrap behind you for a moment.

Now reach around yourself to each side of yourself and tuck the child's legs into the wrap (9&10). My child is 21 months and her legs are quite long. I do not know at which ages this would work well. You will have to make your best judgement.
Toddler all wrapped up in a wrap
While keeping the straps tight again and keeping an arm around the child, untie the back and tighten if necessary. My wrap is long enough to cross over in the back and then bring the ties around front for a square knot (11&12). The child should feel very secure and the wrap should be reasonably tight.

These instructions are provided to give you ideas. I am not a professional and do not accept liability. Please use good common sense. Thank you.

Sunday, October 10, 2010

New Baby Carrier For Me

My first baby was born in 2000 and even before he was born I had my first ring sling sewn and ready to carry him.

Since then I have created many different carriers for myself and others, even having a small cottage business for a while.

After my second was born I learned about wrap carriers, pouch style slings, Mei Teis and Asian Baby Carriers. She was carried in all of them.

This carrier was different. This carrier was to be functional, symbolic, and creative. It also would be a labor of love. I had done some quilting in the past too and thought it would be fun to combine these skills.

In 2007 I was diagnosed with breast cancer. In 2009 I was given the ok to become pregnant. In 2010 my third baby was born. My body which had created cancer, had now created this perfect, healthy being. And I continue to sustain her through breastfeeding.

This carrier was made with love and is proudly worn daily.