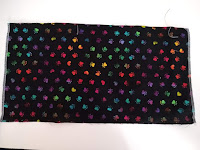

 People all over who are able to sew are sewing masks. There's a strong need for first responders, health care workers and everyone else too. I started making masks to donate, then for myself and my family and finally to sell to others, though I still will donate as needed.
 I have made cute child sized masks and extra large adult sized masks and everything in between. Once I ran out of elastic, I started using strips of performance stretch material that I had leftover from making gymnastics leotards.
And after learning that surgical caps are also needed, I have made those too. I made a few adjustments to the pattern I bought in order to have fewer raw edges and to take advantage of my serger.
Mask patterns out there are great and I've used one in particular and then adjusted to my preferences which removes some of the steps shown in the video. I took pictures to help my youngest make masks too. The sizes I cut out are
Adult 7.75" x 15" - finished width 8"
Teen 7" x 13.5" - finished width 7.25"
Youth 6" x 12" - finished width 6.25"
Preschooler 5.5" x 11" - finished width 5.75"
I have made custom sizes based on people's measurements too. I suggest cutting a paper towel to see what size works well. Here is a video which shows the features.
After cutting the fabric, finish the two shorter ends. I have serged them, but they could be finished with a zigzag stitch or overlock.
I use 1/4" seam allowances.

 Fold in half with right sides together and sew in about 1.5" inches from each end leaving the center area open.
Iron the sewn area so that the "finished" edges are flat. This area becomes the open pocket for filters.
Flip right side out, then arrange so that the opening is in the upper 1" of the back.
Flip to the front and iron in three pleats. I find that it ends up about 3.5"-4" long at this point. For teen and child sized masks, I end up using only 2 pleats.
Sew around all edges, about 1/4" seam allowance except for the top near the "pocket." I sew near the pocket very close to the top edge. This allows enough space for the nose wire.
I have been using twist tie wire from the garden department. It comes on a spool. I cut this to 6.5" for the adult. It allows for about 1/4" of no wire from each end of the pocket.

 Insert wire into the little pocket at the top of the mask. Then sew down the upper pocket area close to the finished edge.
Next add 2.5" wide strips of fabric to each side in order to make a casing. Sew right sides together and overlap each end a bit and fold over. This encloses the raw edges. The front of the mask is the side without the open area for the filter.
After sewing, press down the seam that was just made and the small folded-in sides. Then fold this flap in half towards the mask allowing the raw edges to be enclosed again.
Sew down the casing close to the folded edge. The mask is done. Now the elastic alternative or ties can be threaded through the casings. For fabric ties I use 1.5" strips that are 42" long at least.
I used black performance fabric here and cut about 1/2" wide. As I pull on the strips of fabric, they naturally roll. This can now be knotted into ear loops or knotted behind the head/neck. Here's another video showing knotting the elastic alternative. After knotting at the right spot and testing, knot can be pulled tight and ends can be trimmed.


